As of recent I have received a number of Private Messages asking me how to set up the e-minis as an Index in GlobalServer. Also there have been similar requests on other boards, so here is a visual guide that will walk one through the necessary steps.
First of all one can choose between any of the following symbols:
ES my or NQ my (where my are the Month and Year codes) if one wants to collect data for all sessions for a specific contract.
ES #F or NQ #F for the continuous contract and all sessions
ES my=2 or NQ my=2 for the specific contracts RTH session only
ES #F=2 or NQ #F=2 for the continuous contracts RTH session only.
Unless one has a particular reason to use the specific contracts my suggestion is to use the continuous contract symbol as it simplifies data maintenance (no need to switch contracts etc).
1. In GlobalServer click Insert->Symbol... on the Main menu.
This will open the following dialog box
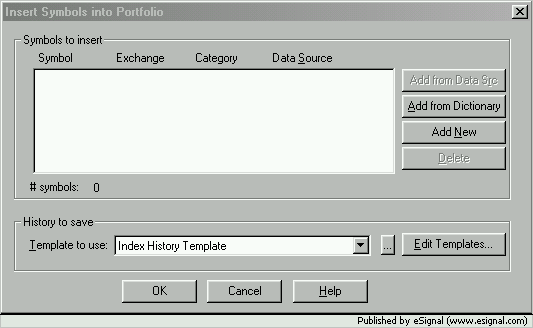
2. Select Index History Template and click Add New
A new dialog box should appear
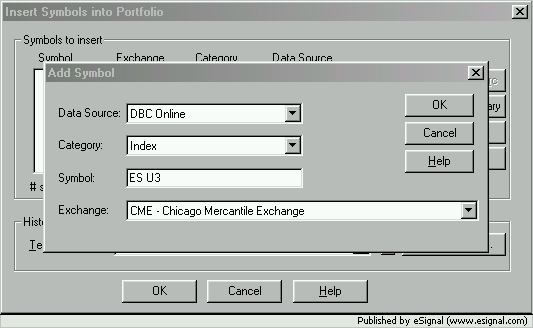
3. Insert the appropriate symbol (the example here is for all sessions specific Sep03 contract), select CME as the Exchange and click OK
A warning message should appear.
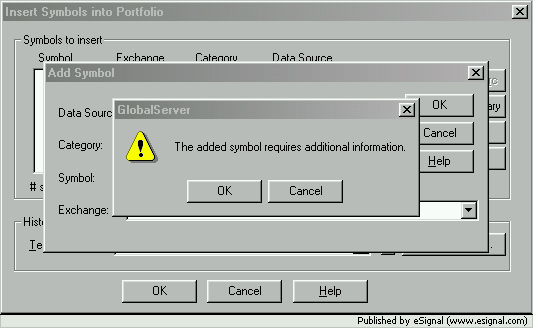
4. Click OK and the next dialog box will appear
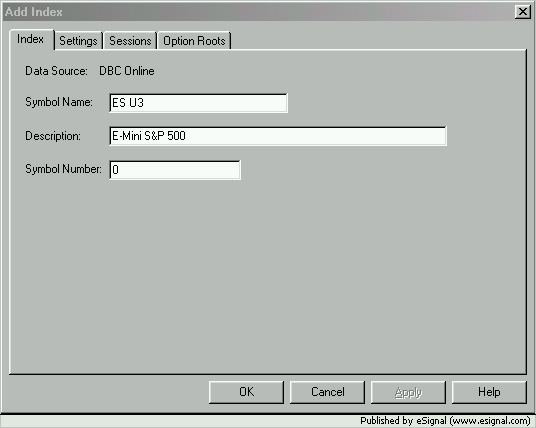
5. Fill in the Description and click the Settings tab.
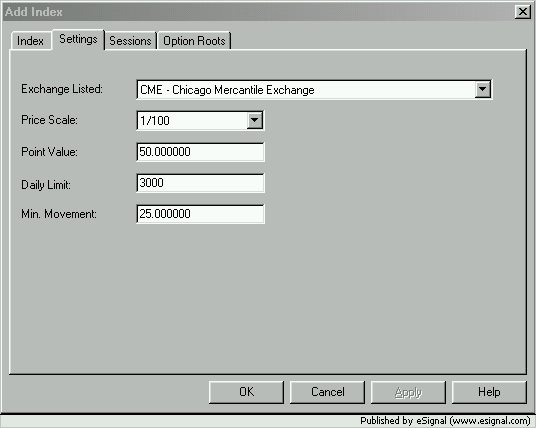
6. Edit the settings to replicate what is shown in the image above. Click the Sessions tab
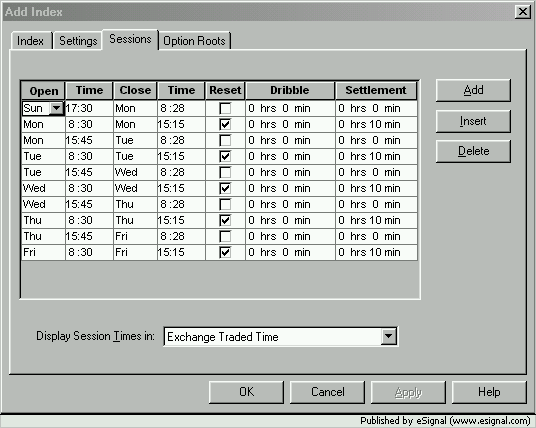
7. Replicate the above Session times (you may need to click Add button to insert new lines). Pay particular attention to the Settlement to make sure it does not overflow in the next session or you will get an error. Also make sure the Resets are only once per trading day.
Note: Substitute the 15:45 start of session time with 15:30 to reflect the changes implemented by the CME after this document was written
When done click OK and you should be taken back to the following window
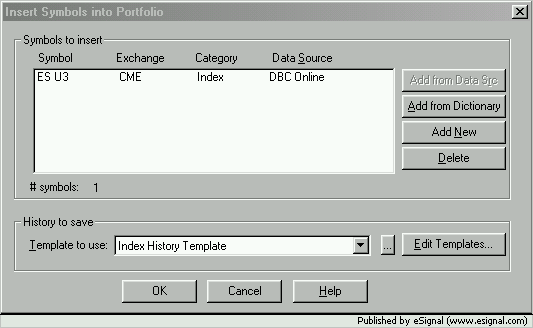
8. Click OK and then in GlobalServer go to Edit the symbol to modify the History To Save to your liking.
The setup is completed.
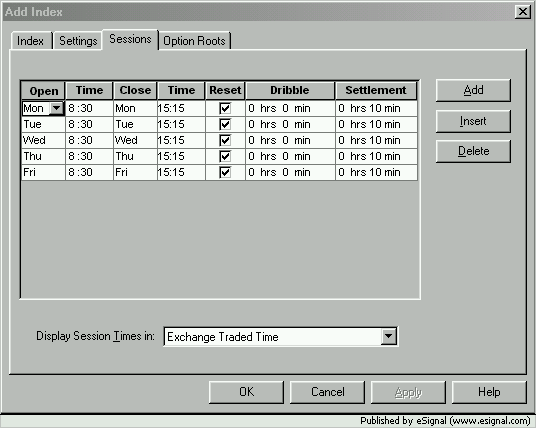
ADDITIONAL NOTES: If one wants to set up the RTH session only then at step 2 write the symbol as follows (you could also use ES #F=2 for the continuous contract)
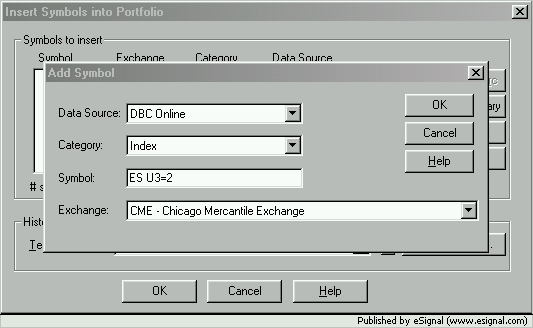
At step 7 use the following Session settings
First of all one can choose between any of the following symbols:
ES my or NQ my (where my are the Month and Year codes) if one wants to collect data for all sessions for a specific contract.
ES #F or NQ #F for the continuous contract and all sessions
ES my=2 or NQ my=2 for the specific contracts RTH session only
ES #F=2 or NQ #F=2 for the continuous contracts RTH session only.
Unless one has a particular reason to use the specific contracts my suggestion is to use the continuous contract symbol as it simplifies data maintenance (no need to switch contracts etc).
1. In GlobalServer click Insert->Symbol... on the Main menu.
This will open the following dialog box

2. Select Index History Template and click Add New
A new dialog box should appear

3. Insert the appropriate symbol (the example here is for all sessions specific Sep03 contract), select CME as the Exchange and click OK
A warning message should appear.

4. Click OK and the next dialog box will appear

5. Fill in the Description and click the Settings tab.

6. Edit the settings to replicate what is shown in the image above. Click the Sessions tab

7. Replicate the above Session times (you may need to click Add button to insert new lines). Pay particular attention to the Settlement to make sure it does not overflow in the next session or you will get an error. Also make sure the Resets are only once per trading day.
Note: Substitute the 15:45 start of session time with 15:30 to reflect the changes implemented by the CME after this document was written
When done click OK and you should be taken back to the following window

8. Click OK and then in GlobalServer go to Edit the symbol to modify the History To Save to your liking.
The setup is completed.
ADDITIONAL NOTES: If one wants to set up the RTH session only then at step 2 write the symbol as follows (you could also use ES #F=2 for the continuous contract)

At step 7 use the following Session settings

Comment